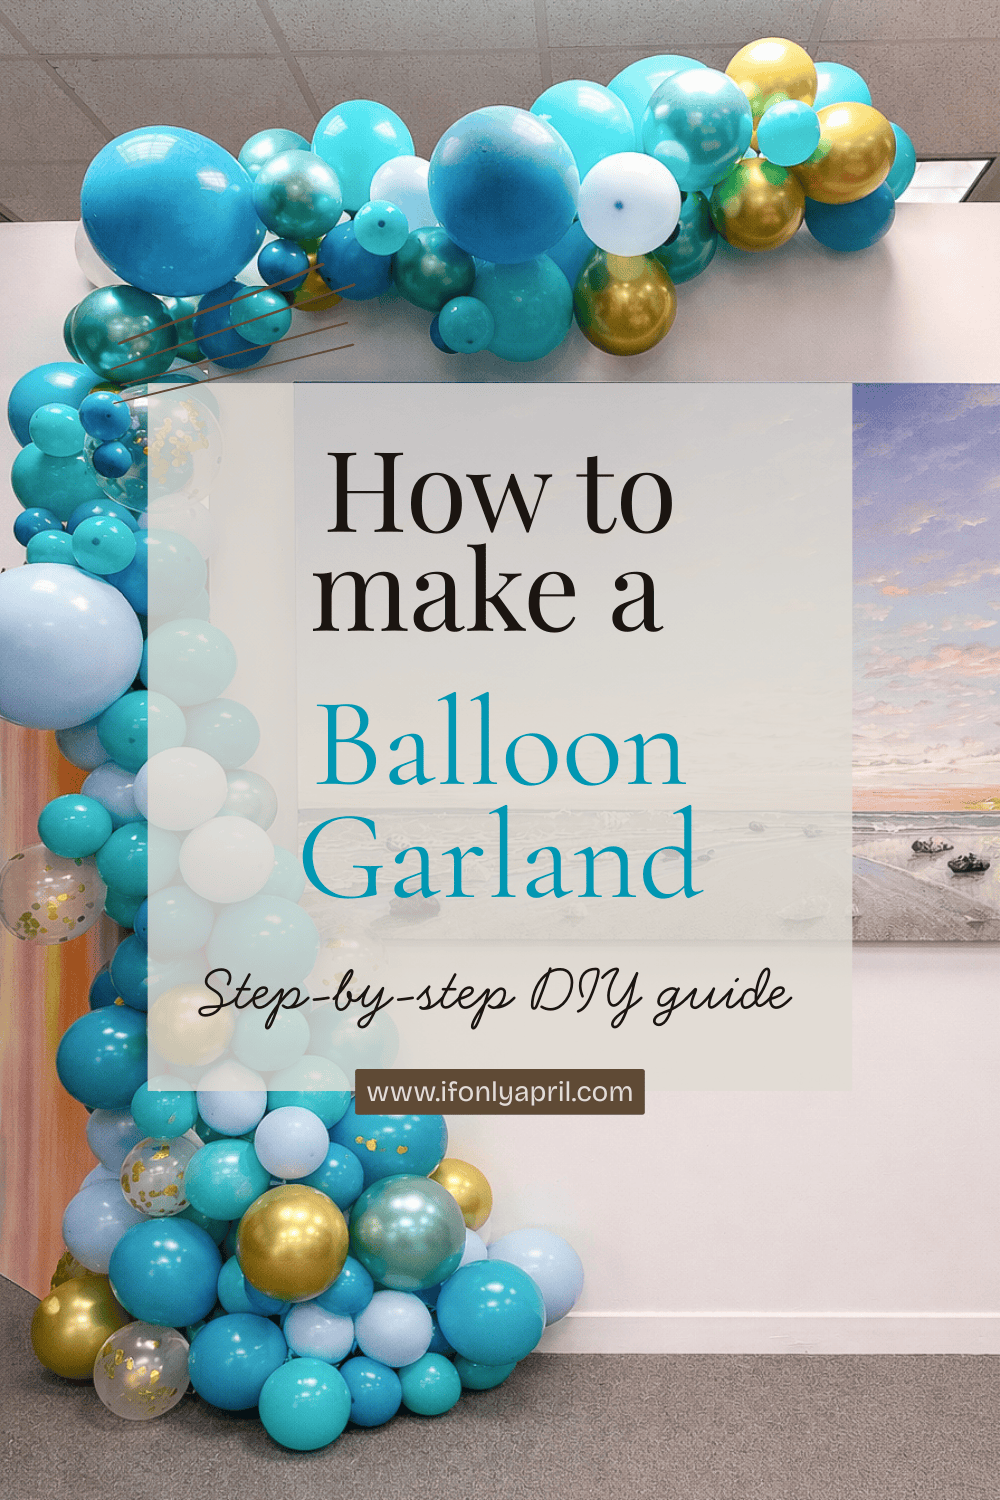
A balloon garland is one of the easiest and most popular DIY party decorations that instantly elevates birthdays, baby showers, weddings, or any celebration, yet it is surprisingly simple and affordable to make at home.
If you’ve been wondering how to make a balloon garlandthis step-by-step guide will show you exactly how to create a professional-looking balloon arch using basic supplies and no special skills – without paying a stylist.

Why make a DIY balloon garland?
Creating a DIY balloon garland saves money, allows you to customize colors, and gives you a show-stopping decoration that looks like it came from a professional event stylist.
Balloon garlands are perfect for:
- Birthday parties
- Baby showers and gender reveals
- Bridal showers and weddings
- Graduation parties
- Holiday decor and photo backdrop

Why you’ll love this DIY balloon garland?
- Budget-friendly party decorations
- Fully customizable in color and theme
- Great for photo backdrops and party tables
- Beginner-friendly and fun to make
Whether you are planning a whimsical kids’ party or a chic adult celebration, this DIY balloon garland will be a Pinterest-worthy centerpiece you’ll want to make again and again. I can vouch for it! Since my first garland I made a few years ago, I’ve made dosens for all kind of celebrations, for friends, family, and my kids.

Supplies needed to make a balloon garland
For a tip: Using balloons in different sizes creates a fuller, more organic balloon garland design.
You might have all the materials at home, or you can simply order a kit on Amazonlike this one that I used for the butterfly garlandor this rainbow one. Those kits come with everything you need (except the pump).
Step-by-step: How to make a balloon garland

Step 1: Inflate balloons in different sizes
Inflate balloons to varying sizes – even within the same color. The variation is key to creating a professional balloon garland instead of a flat or uniform look.
Avoid overinflating; slightly underfilled balloons last longer, look softer, and hold better.
For a tip: Arrange balloons in a color gradient or ombre. This looks gorgeous in photos!

Step 2: Attach balloons to a decorating strip
Insert balloon knots into the holes of the decorating strip, alternating colors and sizes as you go. You can do it on the floor, or connect the strap to two chairs for easier access.
There is no exact pattern required – this flexibility makes balloon garlands perfect for beginners. This step sets the shape of your garland – so take your time and step back to look at balance as you go.

Step 3: Shape the garland
Lay the garland on the floor and gently bend it into your design shape – arch, curve, or asymmetrical shape.
Use glue dots to add smaller balloons where gaps appear. This step gives your DIY balloon arch a high-end finish. I prefer this step when the garland is already on the wall, but perhaps it will be easier for you to do it while it’s still on the floor (or between two chairs).

Step 4: Hang the balloon garland
Use removable hooks to attach the garland to walls, doorways, side tables, or photo backdrops.
At this point, I like to step back and “refill” empty spaces with smaller balloons, making sure it’s the right shape, and there are no visible gaps.
For outdoor balloon garlands, zip ties and fishing line provide extra support and let you secure them to trees or poles.
Step 5: Add decorative elements (optional)
Enhance your balloon garland with faux greenery, flowers, or themed elements. Tucking accents between balloons adds texture and makes the decoration feel custom and intentional, aka Pinterest-worthy decor.
Common mistakes to avoid
- Using only one balloon size
- Overinflating balloons (they’ll pop or look harsh)
- Making the design too symmetrical – curves and clusters look better
- Waiting until the day of the event to assemble
For best results, assemble your garland the day before your party.

How long does a balloon garland last?
Indoors, balloon garlands typically last 3-5 days when made with high-quality latex balloons. Keep them away from heat, direct sunlight, and sharp objects. In my personal experience, they can last even longer than a week, but eventually start deflating and losing their shape.
Final thoughts on DIY balloon garland
Learning how to make a balloon garland is one of the easiest ways to upgrade your party decor without hiring a professional. With minimal supplies and about an hour of your time, you can create a stunning balloon garland backdrop that guests would love and ask about.
xoxo, April
pin it for later


If you are looking for more party decor ideas, you can check these posts:
DIY dreamy art display with hot air balloons

Ultimate Guide to a successful DIY dinosaur party
Tips for a successful toddler party at home

How to throw an outer space birthday party at home

Deixe um comentário