If your kids can’t wait to shout Happy New Year!, this fun countdown craft is the perfect way to make each day feel special.
It’s colorful, easy to make, and filled with little surprises and activities that build excitement as the year ends.
You can start 10 days before New Year’s Eve – or adjust the number of days to fit your family’s plans.
Each day, your kids will tear off one link in the chain to reveal a cheerful prompt like “Make a paper star for good luck!” or “Draw your dream party hat!”
Sounds exciting, right?
Let’s go to the step-by-step tutorial.
Before moving on to the craft, we would appreciate it very much if you would check out our YouTube channel and subscribe to it.
We upload new easy craft tutorials every week that are different from what we publish on the blog. Thank you!
Materials Required:
Gather your supplies before you start:
- Colorful craft papers
- A small piece of thick cardboard
- Decorative paper (like the star-patterned one shown)
- Glue stick
- Scissors
- Black marker or pen
- Craft knife or paper cutter
- Star paper punch (optional)
- Golden foil paper (optional)
Tip: Mix bright and pastel colors for a fun, festive look!

New Year’s Countdown Craft (Step-by-step Tutorial)
Step 1: Cut long paper strips

Choose your favorite colored papers. These will become your countdown strips.
Cut each colored paper into a long rectangular strip. You’ll need one strip per day in your countdown – ten is perfect for a 10-day countdown.
You can do it for as many days as you like, 10 or more. Each day has some activity tied to it.
So if you want your kids to have the opportunity to do more activities, you can choose more number of days.
Here, we used Origami sheets since we had them in stock. You can use any colored papers you have at home. The size of each paper strip we cut is 3 cm x 15 cm.
Step 2: Arrange your strips

Lay out all your colorful paper strips. Seeing the rainbow of colors together already makes it feel like a celebration!
Step 3: Write your first countdown message

Take one strip and write:
“10 DAYS TO GO!!”
Under it, add a fun little activity like “Draw fireworks for the New Year!”
You can customize the activities to your liking. You can ask the kids to choose the activities they want to do too.
Step 4: Write all the countdown prompts

Now repeat this for every strip, changing the number of days and activities.
Here are some ideas we have used:
- 9 days left! Make a silly dance for 2026.
- 8 days left! Design your dream party hat.
- 7 days left! Write your favorite 2025 memory.
- 5 days left! Make a paper star for good luck.
- 1 day left! Say “Happy New Year!” and do a cheer!
Step 5: Make your countdown base

Cut a round shape out of cardboard. This will hold your paper chain.
The circular disc we cut out had a diameter of 11 cm.
Step 6: Cover the base with decorative paper

We took another Origami sheet of size 15cm x 15 cm to wrap over the disc. You can use any paper if you don’t have a patterned one like this.
Make small cuts from different edges of the paper, and glue your paper over the cardboard disc.
Trim off the edges carefully for a smooth, neat finish.
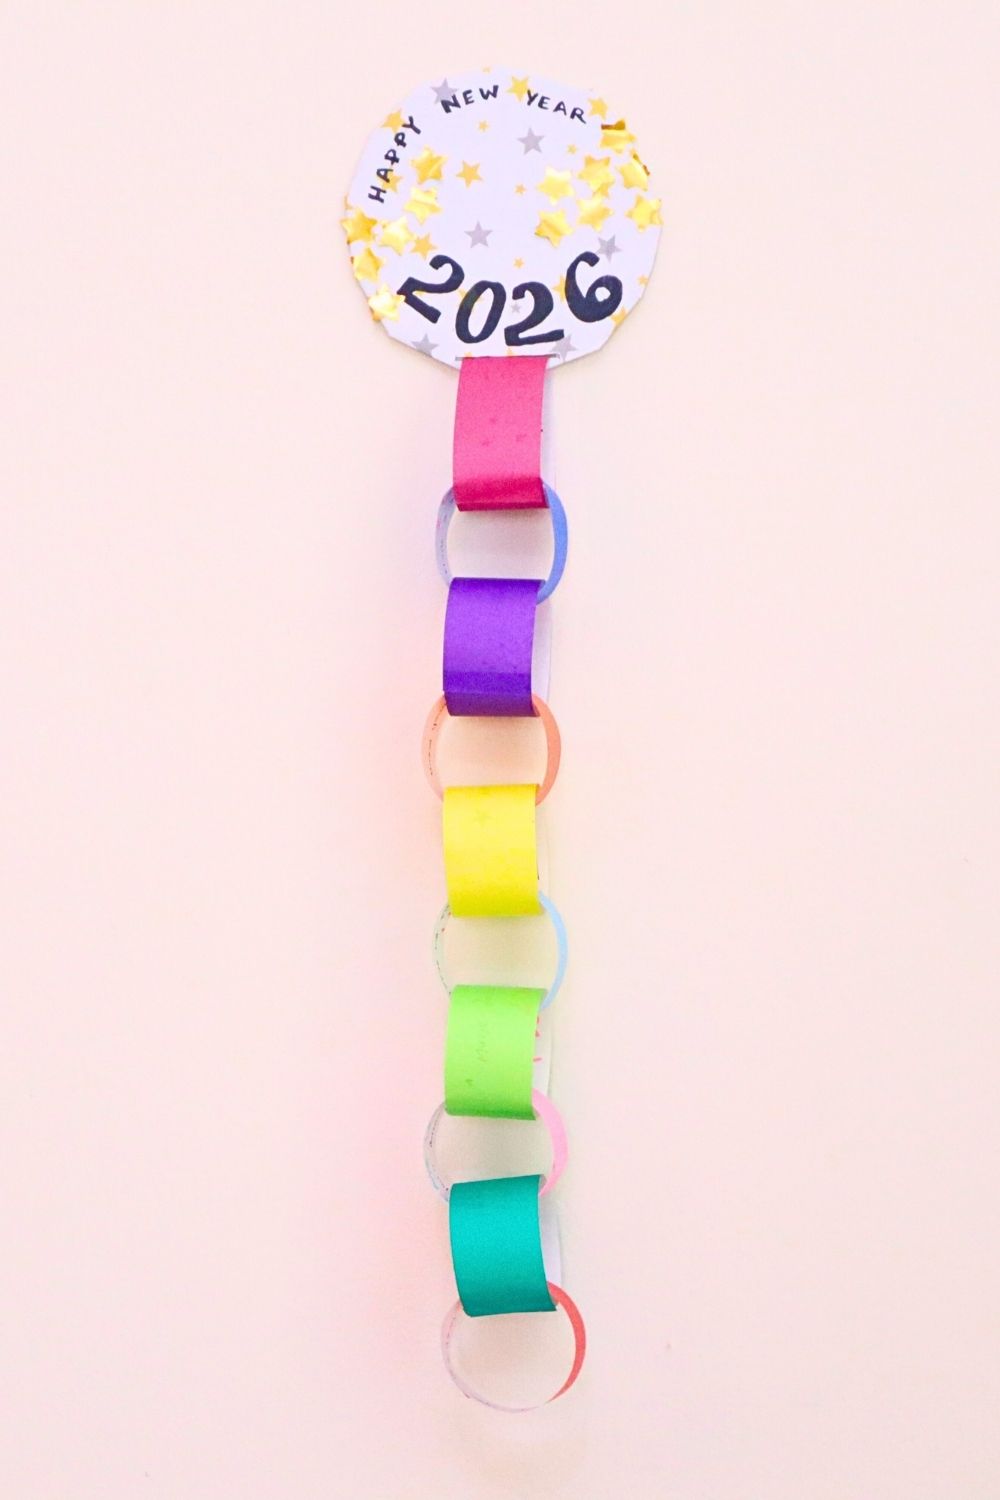
Step 7: Add the New Year design

Use a marker to write “2026” in bold numbers across the middle, and add “Happy New Year” along the top.
Step 8: Decorate with shiny stars

Punch out or cut little stars from golden foil paper and glue them around the circle.
Kids will love how sparkly it looks!
If you don’t have the foil paper and the punch, you can use any normal decorative paper and cut out the shapes you can using scissors.
Here, kids can use their creativity and come up with ideas to decorate the disc.
Step 9: Make a slit for your paper chain
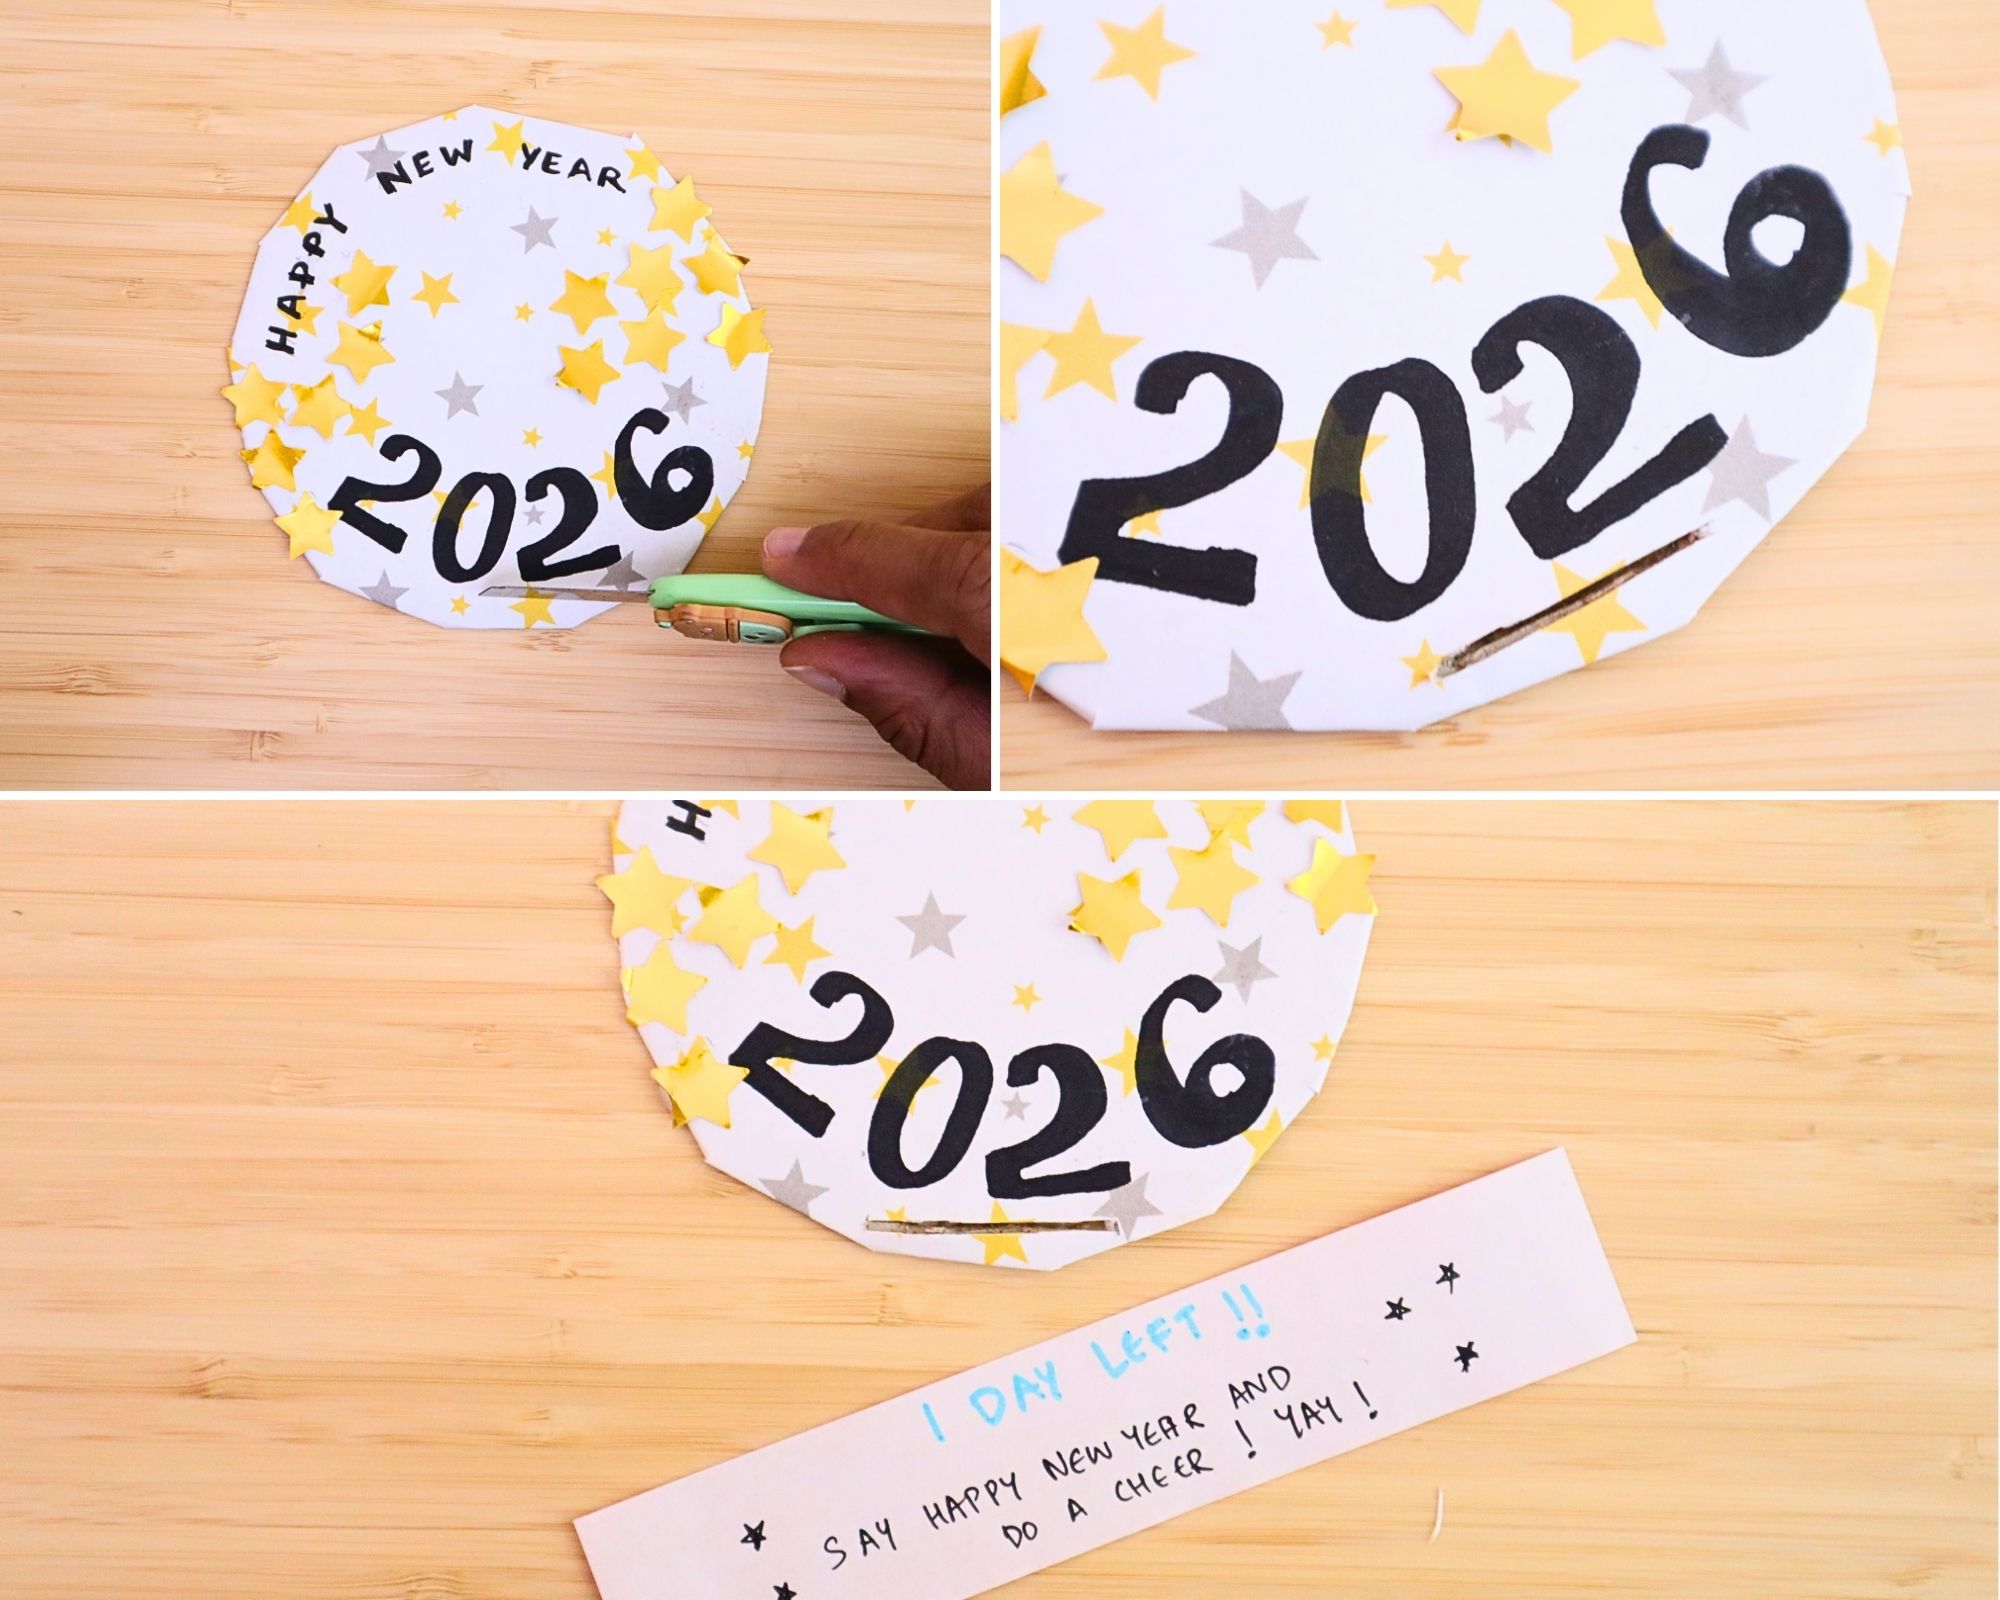
Use a cutter or craft knife to make a small slit at the bottom of your circle. Be sure an adult helps with this part.
The slit should be wide enough for a paper strip to slide through.
Step 10: Insert the first countdown strip
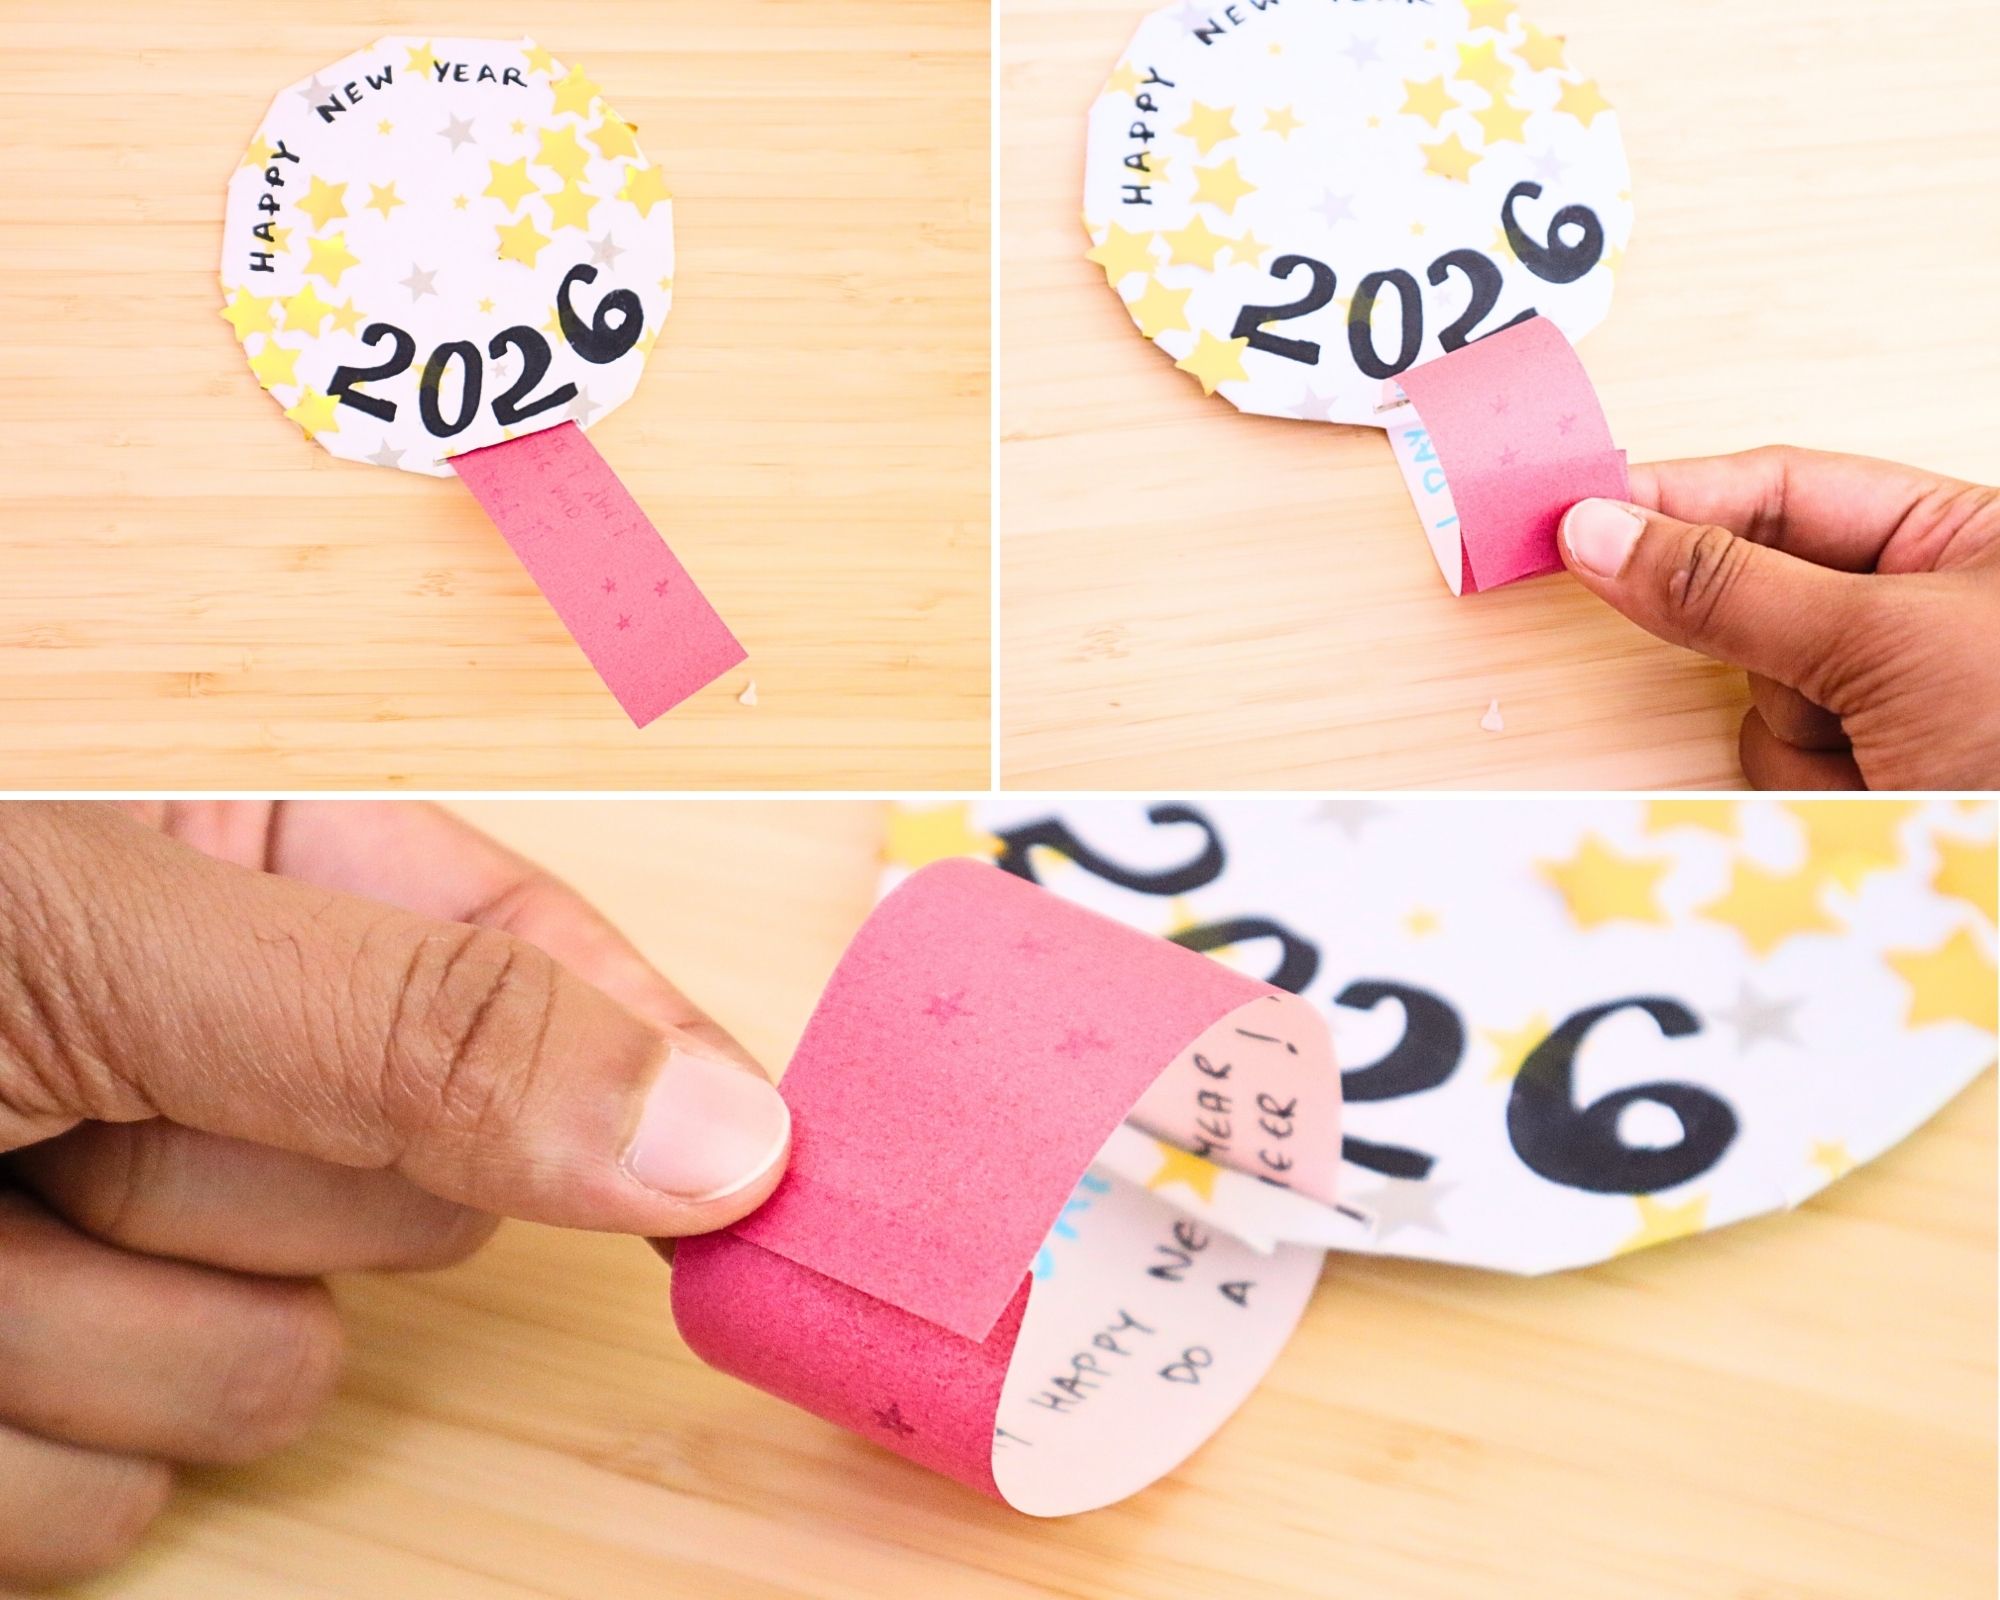
Slide your first strip through the slit and glue the ends together to make a loop. Keep the writing inside. It’ll be a fun surprise when the day arrives!
Step 11: Keep adding the loops
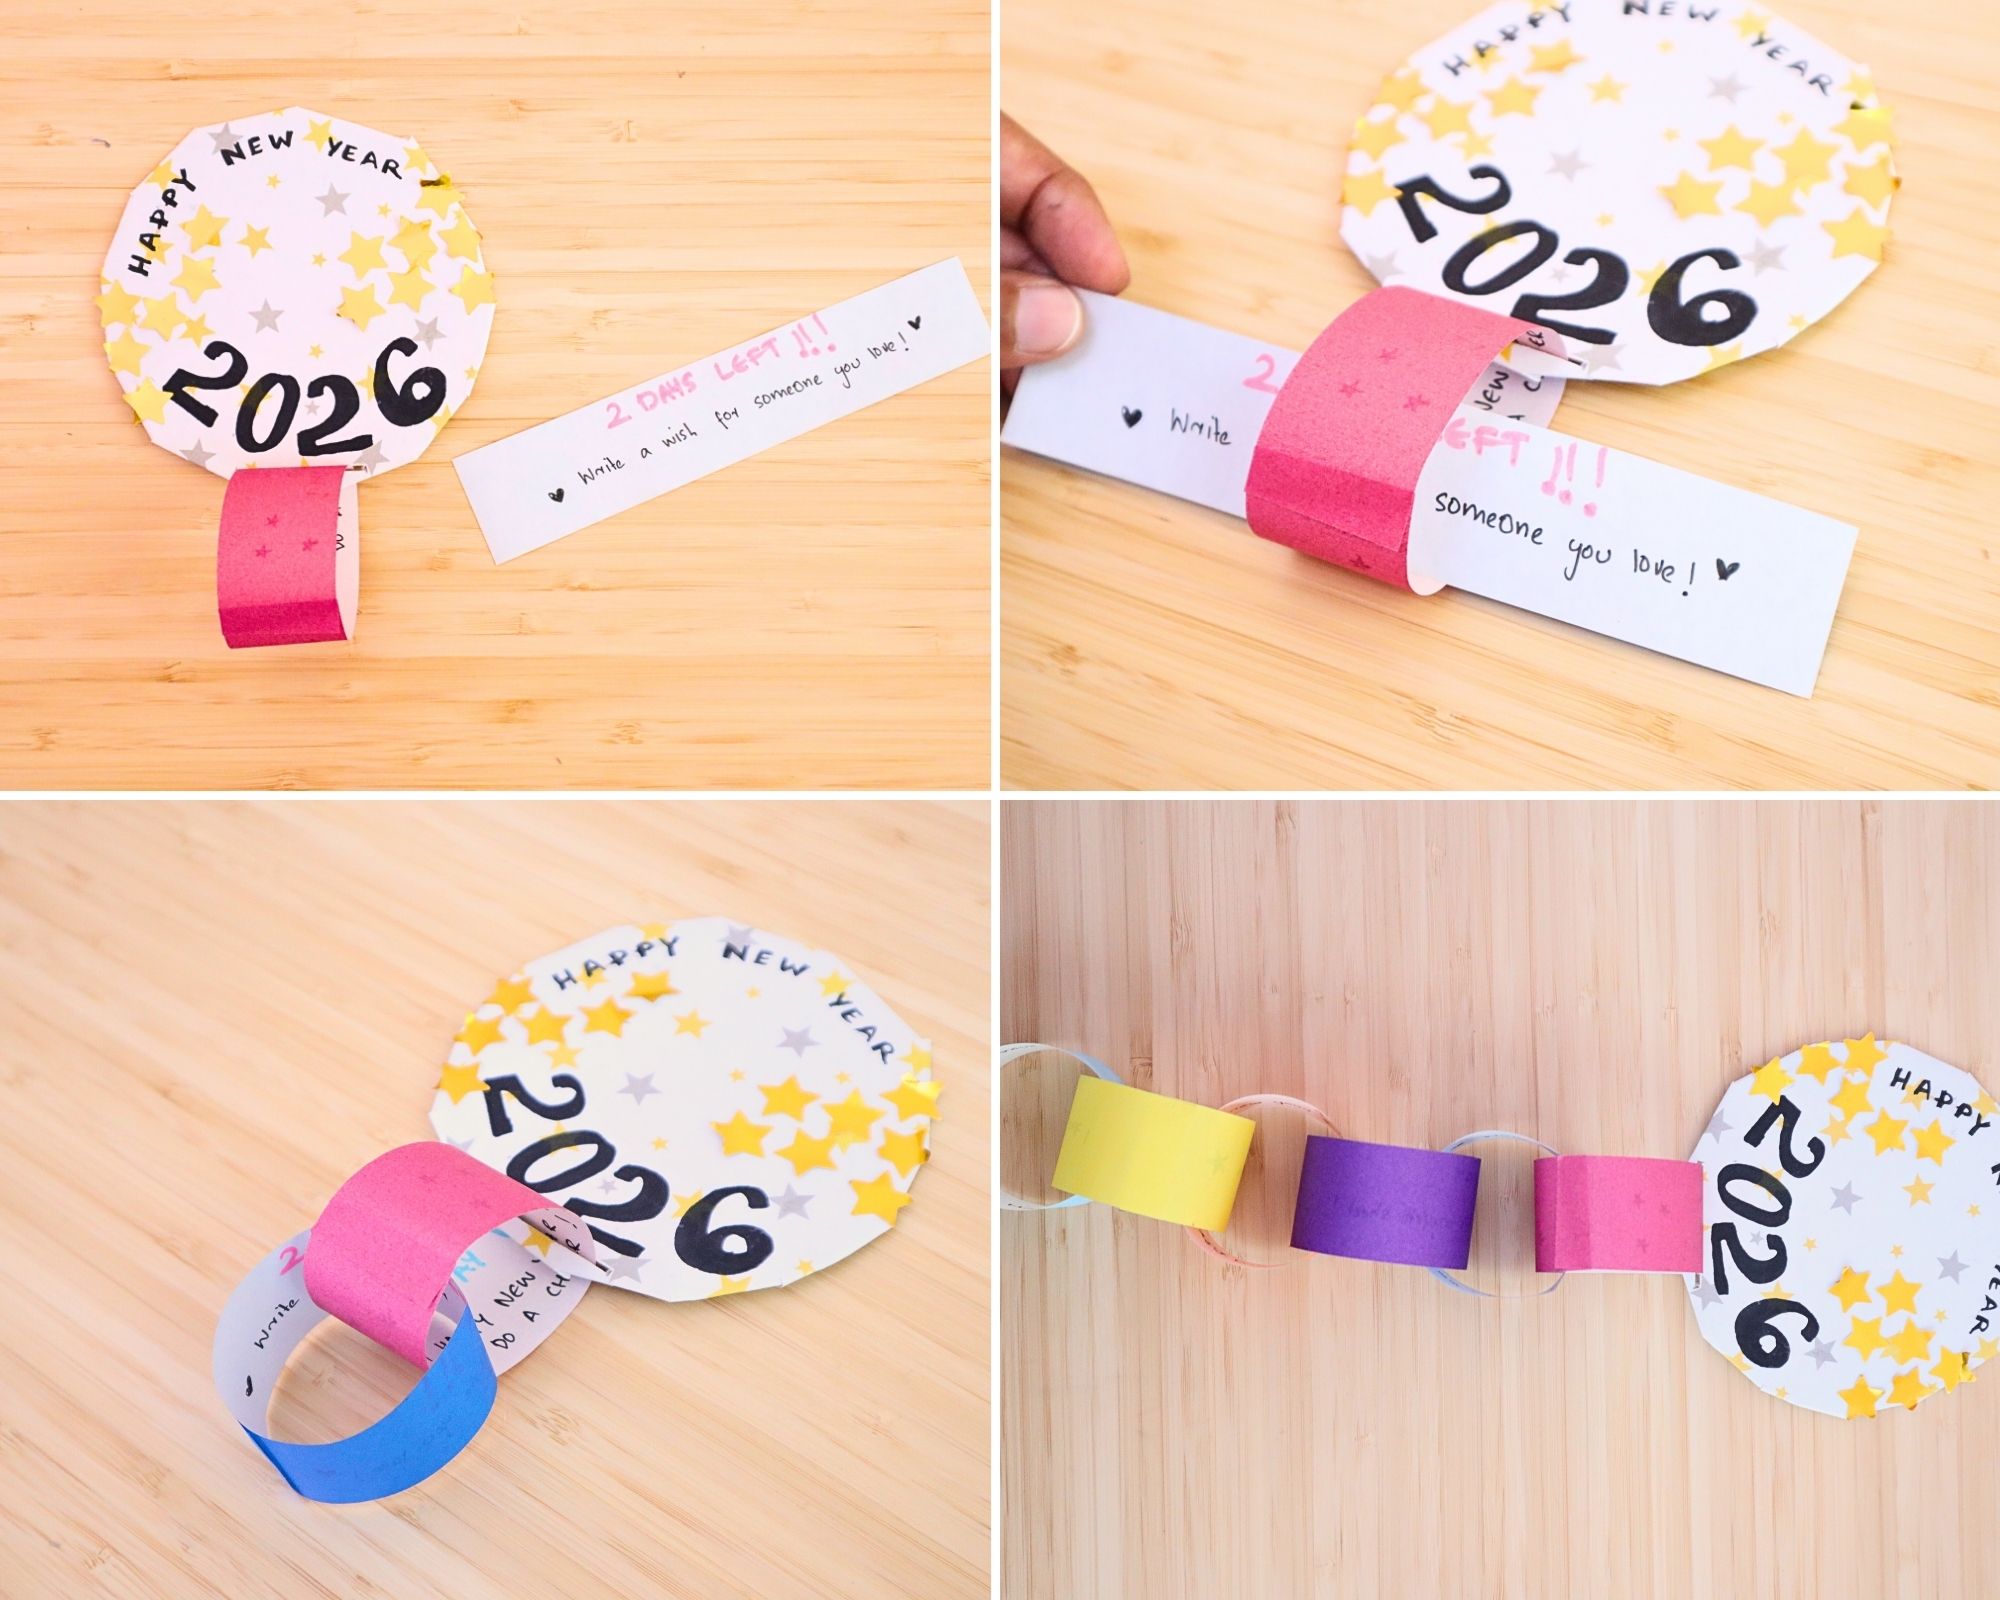
Loop the next strip through the first and glue the ends. Keep going until all your countdown strips form a beautiful colorful chain.
Step 12: Display your countdown
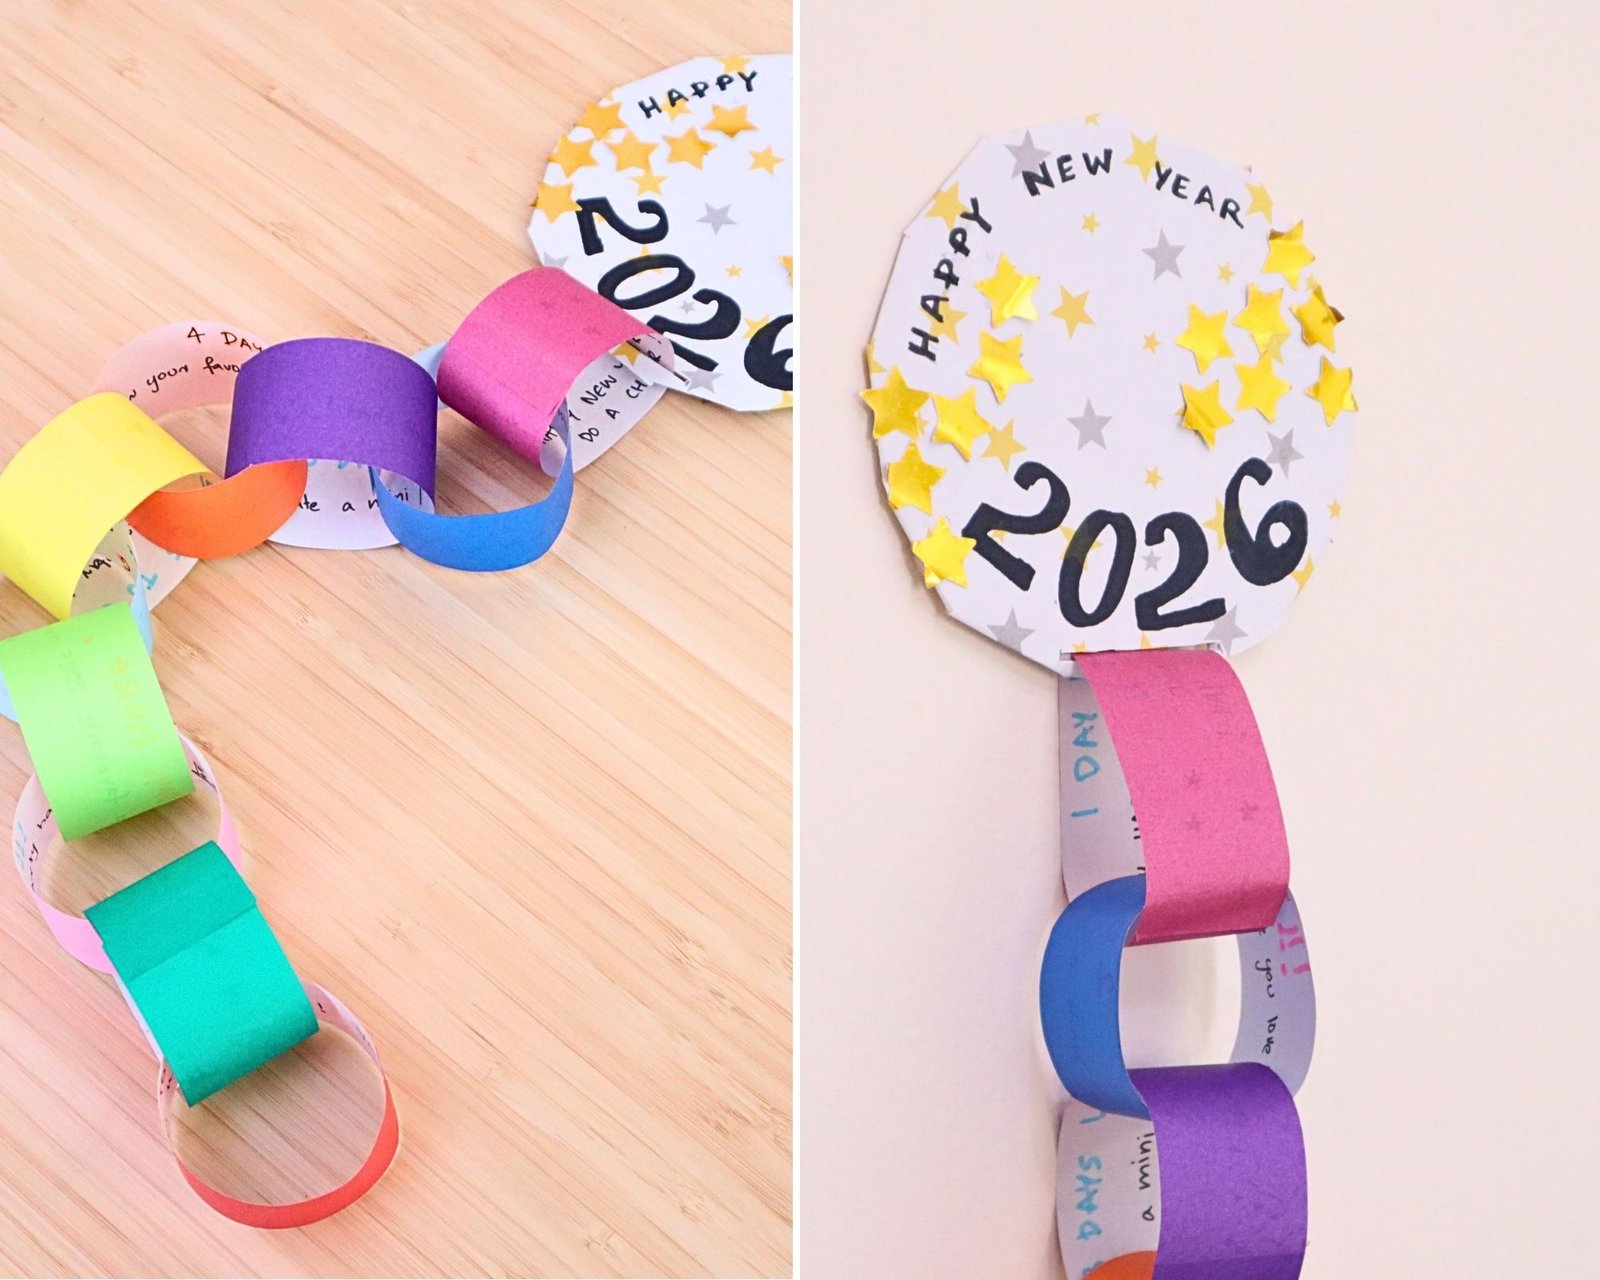
Hang your countdown on a wall or door where everyone can see it. Each day, your kids can tear off one loop and read their special activity.
It’s a lovely way to make every day feel festive as New Year’s Eve approaches!
Tips for Parents
- If your kids are younger, write simple tasks like “Give someone a hug” or “Draw a smiley face.”
- For older kids, include more creative prompts like “Write a New Year’s wish” or “Design a party invitation.”
- You can start anytime in December-just adjust the number of paper links to match your countdown.
- Turn it into a family tradition! Each year, let your kids help design their own themed countdown for the new year.
Final Thoughts
This New Year countdown craft is a cheerful way to build anticipation and make each day leading up to January 1st a little more special.
We are sure your kids will love the excitement of tearing off each link and discovering a fun mini activity inside. And it is easy to set up with just a few supplies.
It’s a wonderful project to do together as a family during the holiday break.
When the final loop comes off and the “Happy New Year!” message appears, it’ll feel like the perfect grand finale to a creative start to 2026.
Try this activity with your kids and let us know how it went in the comments below.
Deixe um comentário